
Where to Place RO Leak Sensors in a Whole-House System
Place RO leak sensors where water is likely to collect beneath your system's connections, filters, pumps, and storage tank. The best location is usually a low, accessible spot , rather than the top of the equipment where a leak may begin.
A whole-house reverse osmosis system can spread across a garage or utility area. That means one sensor may not cover every possible leak. Start by following the water lines and looking at how water would travel across the floor.
Map Your Whole-House RO System First
Before choosing sensor locations, trace the system's path. Feed water enters the pretreatment equipment, travels through the RO unit, and may then move into a storage tank before a pump sends it to the house.
Your layout may also include post-treatment equipment and a separate drain line. Our guide to Florida well water filtration stages explains how these components fit together.
Find the Connections
Look for joints where pipes or tubing meet filter housings, valves, pumps, and tanks. A leak can begin at a fitting, run down the outside of a component, and reach the floor some distance from its source.
Pay attention to connections you can see and those tucked behind equipment. You don't need to take anything apart to make a placement plan.
Follow the Floor
Floor slope matters as much as the plumbing layout. Look for low spots, seams, raised pads, and barriers that could change where water collects.
For example, a leak beneath a pump on a raised equipment pad may run off one side. A sensor on the opposite side could stay dry while water reaches the surrounding floor. Place it along the likely path, where you can still reach it for service.
Protect Feed Lines and Pretreatment Filters
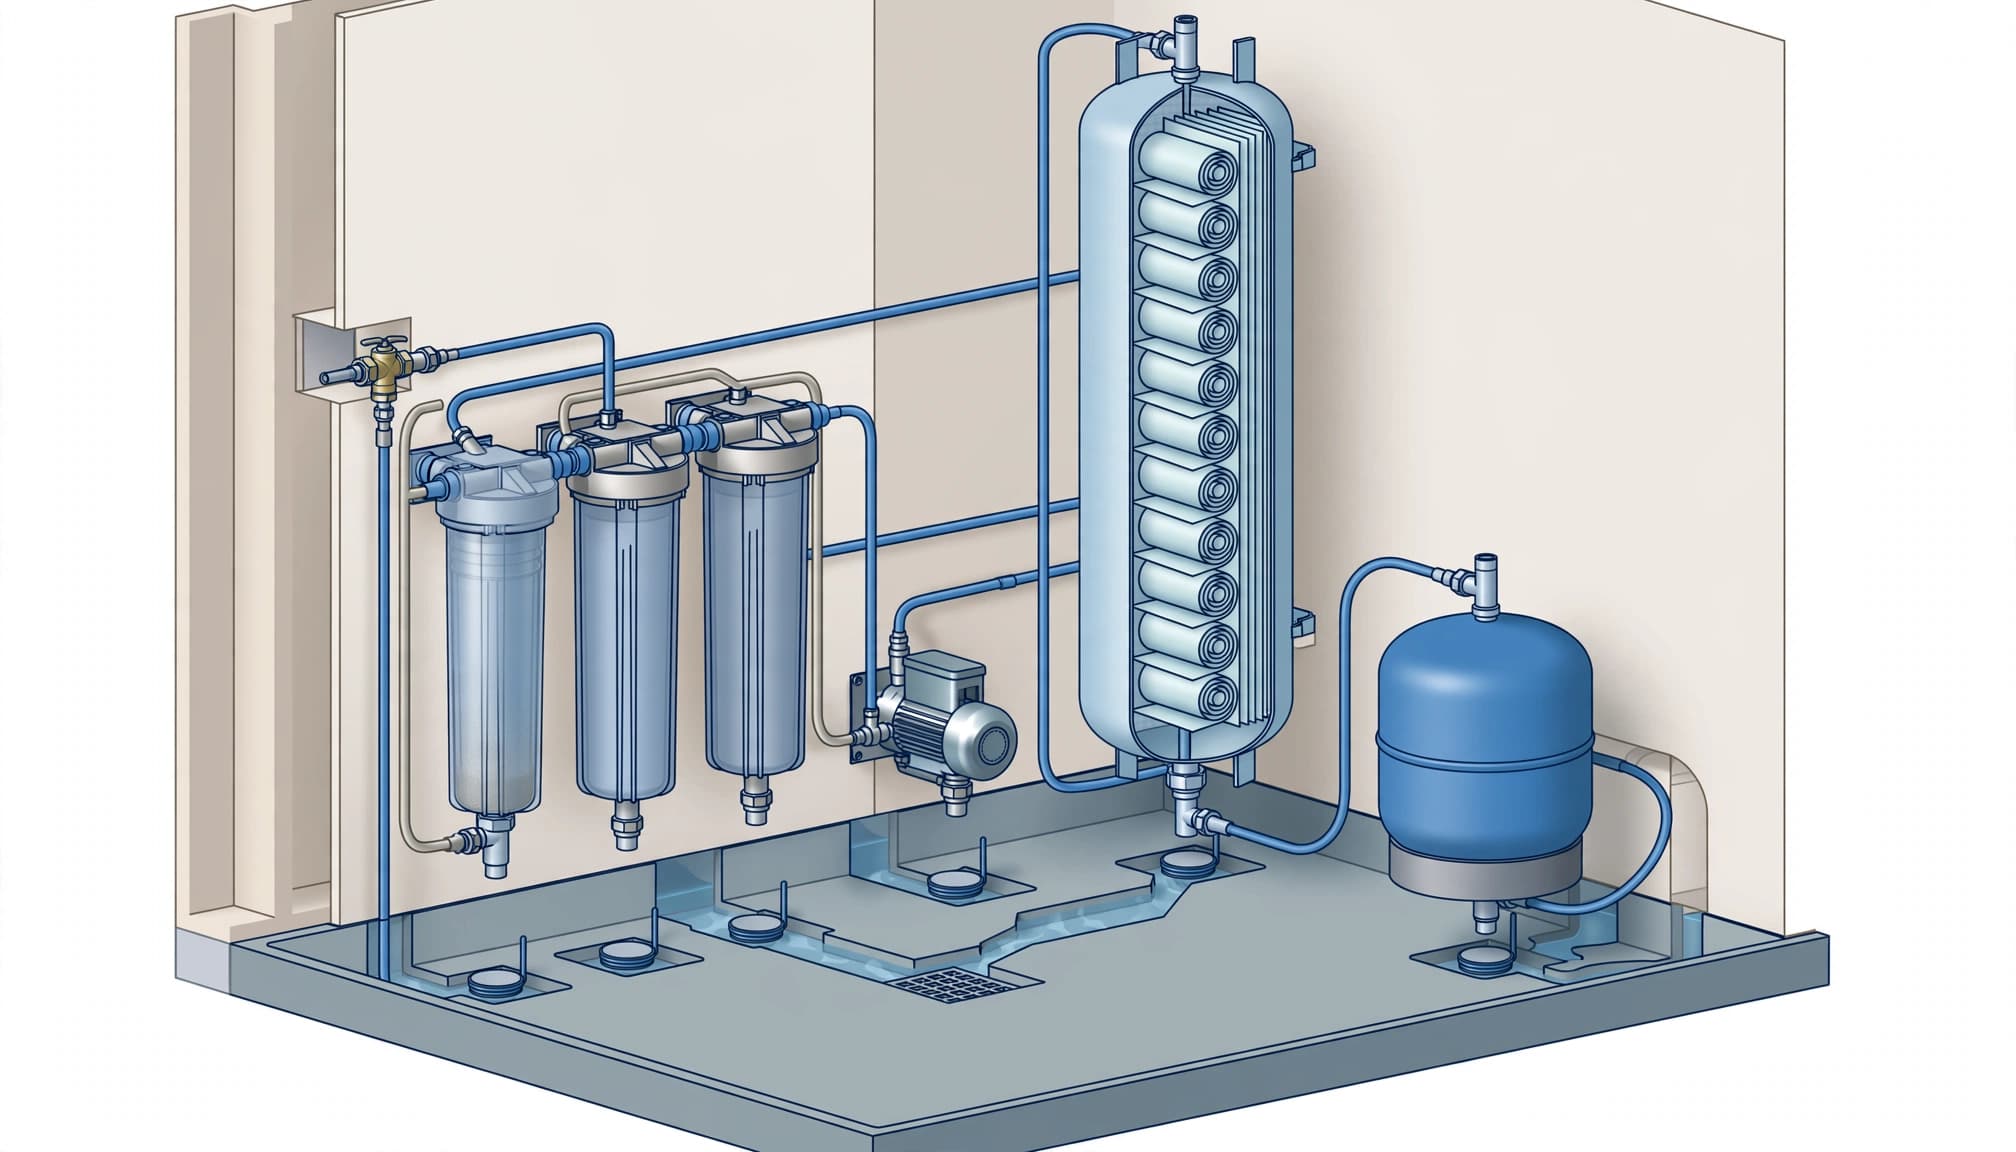
Pretreatment equipment often has several connections in a relatively small area. Feed valves, sediment filters, and other housings deserve attention because water can escape at a joint or seal.
Inlet Valves and Fittings
Place a sensor at floor level below the incoming water connections, where a drip or small stream would collect. If the feed valve and filter bank sit apart, each area may need its own sensor.
Include any accessible bypass or shutoff connections in your visual inspection. A sensor near the equipment won't necessarily detect water that travels behind a wall or collects on the other side of a raised base.
Filter Housings
Filter housings have seals and connections that receive attention during routine cartridge changes. A cracked housing, worn O-ring, or loose fitting can leave moisture beneath the filter.
Position a sensor below the housings or in a suitable collection pan beneath them. Leave enough room to remove the housings and replace filters without trapping the sensor or knocking it out of position.
Cover the RO Unit and Its Pumps
The membrane assembly and its connected plumbing create another area to protect. Depending on the installation, a booster pump may also sit near the RO unit.
Membrane Housings and Tubing
Look beneath membrane vessels, tubing connections, valves, and nearby manifolds. Put the sensing surface where a leak from those parts can reach it, rather than directly on the equipment.
If the membrane assembly is mounted above a collection pan, the sensor should sit at a point where water would gather in that pan. Keep it away from edges where drips could miss it. A floor sensor outside the pan may not detect water held inside it.
Booster Pump Connections
Check the area below the pump body and its inlet and outlet fittings. Water may follow a pipe or pump base before reaching the floor, so the most useful location isn't always directly underneath a joint.
Keep the sensor clear of moving parts and electrical components. If a pump and membrane assembly sit on separate pads, treat their drainage paths as separate areas when planning coverage.
Place Sensors Around Storage and Delivery Equipment
Whole-house RO systems may use a large atmospheric tank, a pressurized product-water tank, or both. The layout determines where leaks could collect and how much equipment you need to cover.
Storage Tank Connections
Place a sensor near the low area beneath the tank's accessible connections. Depending on the tank, these can include the inlet, outlet, drain, and overflow piping.
A tank can conceal water at its back or underneath its base. If water from one side won't reach the sensor on the other, that area needs separate coverage. Avoid positioning a sensor where the tank's weight or base could damage it.
The tank also needs room for routine care. Our guidance on whole-house RO sanitization covers the different tank configurations you may encounter.
Repressurization Pump and Outlet Line
Some systems use a pump to send stored water into the home's plumbing. Place a sensor where water from that pump and its connections would collect.
If the pump sits away from the tank, a sensor beneath the tank may not cover it. Follow the outlet line as well, especially where a connection is close to the equipment and a leak could reach the floor.
Watch Drain Lines and Downstream Treatment
The RO system sends rejected water to a drain during normal operation. A leak sensor belongs near a vulnerable connection or likely spill path, not where it will sit in normal drain water.
RO Drain Connections
Look for the place where the reject line connects to the drain arrangement. A loose connection or damaged line can release water outside its intended path.
Place a sensor on the floor where that water would collect, while keeping it out of the drain opening. Don't block the drain or alter the drain connection to make room for a sensor.
A damp floor near the drain deserves attention, even if the system otherwise seems to be operating normally. Continuous drain flow combined with pressure or water-quality changes can also point to a service issue.
Post-Treatment and Distribution Lines
Some installations include equipment after the storage tank, such as a polishing filter or another treatment stage. Give its housings and fittings the same attention as the equipment before the membrane.
Follow the treated-water line until it leaves the RO service area. A sensor beneath the RO unit won't protect a separate connection across the room if water cannot reach it.
Position RO Leak Sensors for Contact With Water
A sensor only helps at the location it can monitor. The sensing contacts need a clear path to the water that escapes, and the device needs to remain in the position intended by its manufacturer.
Use Collection Points
Place the sensing surface flat against the floor or in the low part of an appropriate pan. A sensor resting on a pipe, shelf, or raised lip may stay dry while water collects below it.
Where a floor slopes toward a low point, use that path to guide placement. Also consider whether a spill would escape around the edge of a pan. Water outside the pan needs its own path to a sensor.
A sensor beneath a fitting can miss a leak if the water runs along the pipe and drips somewhere else.
Avoid Obstacles and Routine Moisture
Keep sensors out of the way of doors, stored items, and equipment that could shift them. Don't place one where it will routinely get wet during cleaning.
If condensation or another source regularly leaves the floor damp, address that moisture and choose a location that still covers the leak path. Don't hide a sensor behind an obstacle simply because it's close to a connection.
Keep Sensors Accessible for Testing
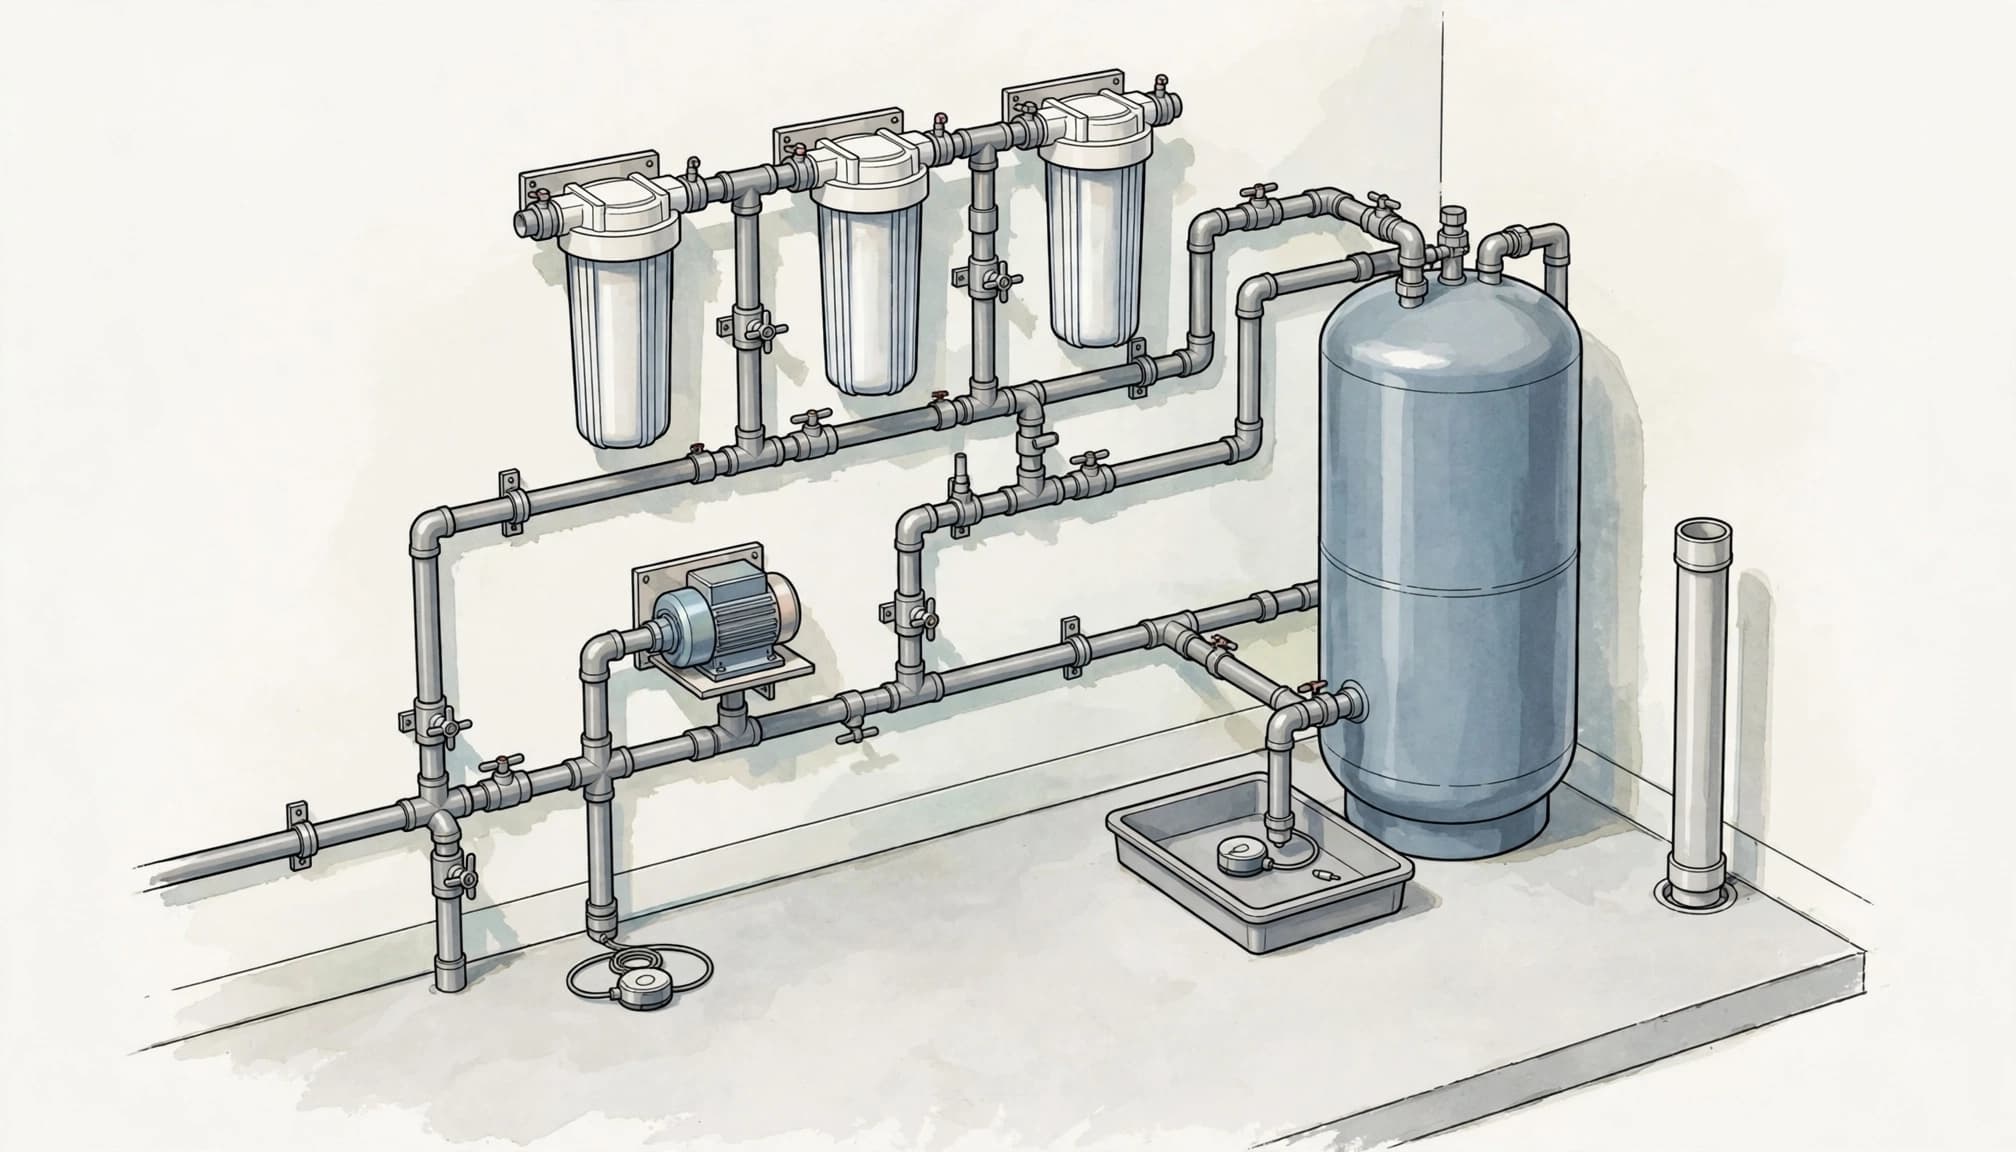
Good placement leaves room for both detection and maintenance. You should be able to reach each sensor without moving a full tank, disconnecting plumbing, or reaching through electrical equipment.
Leave Room for RO Service
Filter changes, pump repairs, and tank work all require access. Place sensors where a technician can see them and return them to the correct spot after working nearby.
Keep the area clear of boxes and supplies. A sensor pushed behind stored items may be harder to inspect, and those items can also redirect water away from it.
Test and Inspect the Devices
Follow the sensor manufacturer's testing instructions. Test the sensing contacts without soaking electrical equipment or creating water around a pump or controller. Dry the sensor and floor afterward, then return it to its intended position.
Inspect sensors during routine RO maintenance and after work around the equipment. Replace batteries when applicable, and make sure you know how you will notice an alert. A sensor left out of place after a filter change may leave that area uncovered.
Know What to Do When a Sensor Detects Water
An alert tells you to investigate, but the sensor's location may not identify the source. Water can travel along tubing or across the floor before reaching it.
If you can do so safely, close the designated RO feed-water shutoff. Stored water may still be present in the tank and lines, so closing the feed doesn't necessarily stop every leak.
Stay away from wet electrical equipment. Don't touch a wet pump, controller, plug, or switch. If you can't isolate power safely from a dry location, get qualified help.
Once the area is safe, look for moisture around accessible fittings and housings without loosening them. Don't overtighten plastic parts or open a pressurized housing. A flashlight and a dry paper towel can help you spot where moisture returns.
Repeated leaks, pressure changes, and unusual pump behavior are signs your whole-house RO system needs service. At Trademark Water Systems, we provide water-treatment installation and repair in Naples and Southwest Florida.
Give Each Leak Path a Place to Go
The most useful sensor locations are the spots water can reach beneath your actual equipment. Follow the plumbing, account for floor slope, and give separate areas coverage when water can't travel between them.
Keep every sensor visible and accessible for testing and maintenance. That makes it easier to put it back where it belongs after RO service and act when it detects water.
Latest posts
Read Our Blog
Tips, guides, industry best practices, and news.


Contact us
Get in touch
Our friendly team is ready to chat.
