UV Lamp Replacement Schedule for Private Well Systems
A UV unit can look normal while its lamp has reached the end of its service life. UV lamp replacement keeps a private well disinfection system working as it was designed to work.
The lamp's visible glow doesn't confirm that it still produces enough germicidal UV energy. A simple schedule, matched to your equipment manual and water conditions, helps you avoid guessing. Start by identifying the lamp's rated operating hours and the date it was installed.
UV Lamp Replacement Schedule for Private Well Systems
Many residential UV systems call for an annual lamp change, often after about 8,000 to 9,000 hours of continuous use. However, the manufacturer's instructions always take priority. Some systems use a different hour rating, and a controller may track actual run time rather than calendar time.
Replace the lamp before its rated hours expire
A UV lamp loses germicidal output over time, even if it still lights. Therefore, mark the installation date on your maintenance calendar and use the controller's hour count when available.
If the controller displays a lamp-life reminder, don't wait for a total failure. Order the correct replacement lamp by the model number listed in your manual or on the system label. A lamp that fits physically may still be the wrong type for the controller or chamber.
A blue glow only shows that the lamp has power. It does not confirm that the system can deliver its intended UV dose.
Keep a record of every service visit
Write down the lamp model, installation date, running-hour reading, and any sleeve cleaning. This record helps when an alarm appears or a technician needs to diagnose a performance problem.
For homes that use well water continuously, annual UV lamp replacement is often easier to remember when scheduled with other water-treatment maintenance.
Know Which UV Components Need Attention
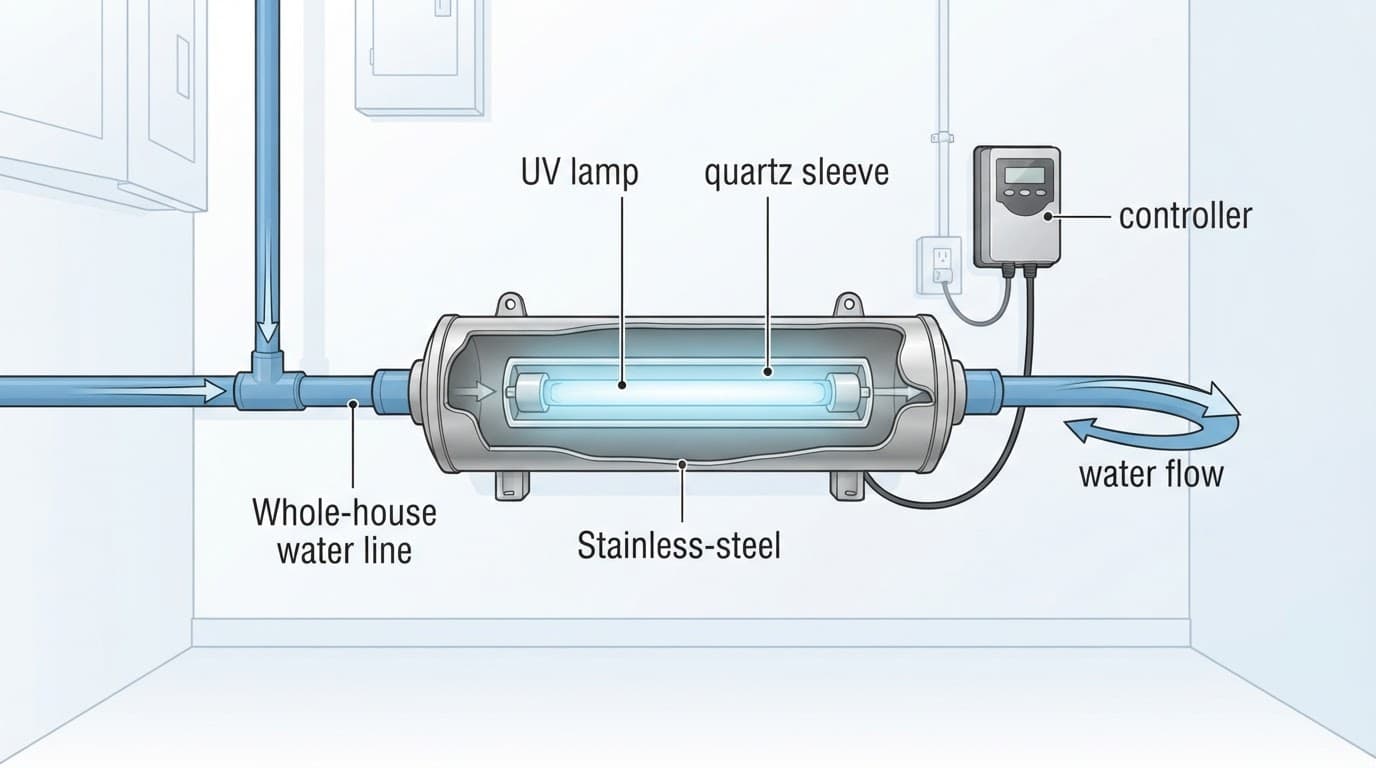
A UV system contains several parts, and they don't follow the same replacement schedule. Replacing the lamp does not automatically mean replacing the quartz sleeve, sensor, or controller.
| Component | What it does | Usual service need |
|---|---|---|
| UV lamp | Produces germicidal ultraviolet light | Replace at the manufacturer's rated hours |
| Quartz sleeve | Keeps the lamp dry while UV light passes into water | Inspect and clean, replace if cracked, cloudy, or damaged |
| Ballast or controller | Powers the lamp and may track lamp life | Replace only if faulty or damaged |
| UV sensor | Measures UV intensity on equipped systems | Keep clean and inspect if alarms occur |
The quartz sleeve needs inspection
The quartz sleeve is a clear glass tube around the lamp. Minerals, iron, manganese, or sediment can coat it and block UV light. A lamp can be new, yet perform poorly through a dirty sleeve.
Use only cleaning methods approved by the equipment manufacturer. Never force the sleeve or use abrasive materials, because it can crack easily.
Controllers and sensors need diagnosis
The ballast or controller supplies the lamp's correct electrical power. A UV sensor, when your system has one, monitors UV intensity and may trigger an alarm. Neither part has a standard yearly replacement rule.
A persistent alarm, failed display, damaged wiring, or sensor warning calls for professional service rather than a lamp swap alone.
Prepare Safely for UV Lamp Replacement
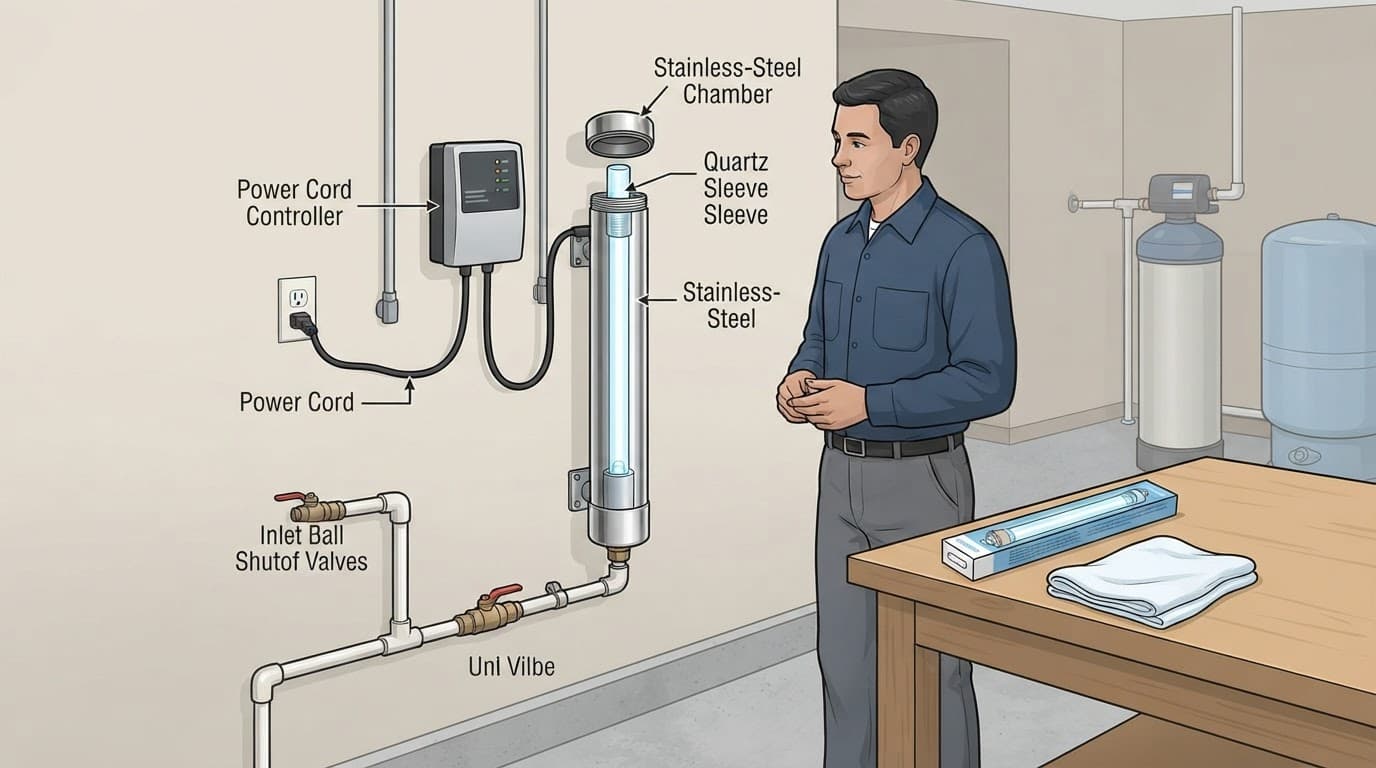
UV lamps are fragile, and the chamber may be warm or pressurized. Gather the correct lamp, any approved O-rings, clean gloves, and the manufacturer's instructions before starting.
Shut down power and water first
Turn off electrical power at the unit and unplug it if the system design allows. Then close the water supply valves and relieve pressure according to the manual. Give the lamp time to cool before touching the chamber.
Handle the new lamp carefully. Oils from bare fingers can leave residue on the glass, so use clean gloves or a lint-free cloth. Keep the lamp away from hard surfaces and never look directly at an energized UV lamp.
Reassemble slowly and check for leaks
Install the lamp and sleeve parts in the order shown in your manual. Check O-rings for wear, debris, or flattening, then lubricate them only if the manufacturer permits it.
After reassembly, restore water flow slowly and inspect the chamber connections for leaks. Wait until the chamber is full of water before restoring power. Finally, reset the lamp-life timer if your controller has that feature.
Water Quality Can Shorten UV System Performance
UV treatment works best with clear water. Sediment, hardness scale, iron, manganese, and cloudy water can shield microorganisms or coat the quartz sleeve. A prefilter or other treatment step may be necessary before the UV chamber.
If a water test shows bacteria, learn more about UV treatment for bacteria in well water. A UV unit can be part of a sound treatment plan, but it doesn't correct a damaged well, poor well seal, or changing source-water conditions.
Call a professional when the system gives warnings
Schedule service if the unit alarms after a new lamp installation, the quartz sleeve is cracked, or the chamber has a leak. Get help when you aren't certain which valves feed the system or how the installation was assembled.
Retest after flooding, well repairs, plumbing work, or changes in water taste, odor, or appearance. A regular private well water testing schedule helps identify changes that can affect UV performance.
Keep Your UV Protection on Schedule
Annual lamp changes, or replacement at the manufacturer's specified operating hours, keep the system from running past its intended service life. The lamp, sleeve, controller, and sensor each need different care.
Treat the controller's reminder as a maintenance appointment, not a nuisance alarm. A timely UV lamp replacement protects the performance of the entire well-water treatment system.
Latest posts
Read Our Blog
Tips, guides, industry best practices, and news.


Contact us
Get in touch
Our friendly team is ready to chat.