
How to Plan Water Treatment Plumbing During a Remodel
A remodel can hide pipes for decades, so water treatment plumbing needs a place in the plan before demolition begins. If filters, softeners, or reverse osmosis equipment are added after cabinets and drywall are finished, access and drainage can become difficult.
Good planning connects your water goals with the home's supply lines, drain route, electrical needs, and service space. Start with the water source and a professional evaluation, then coordinate the installation before walls close.
Start with water quality and household goals
Water treatment equipment solves different problems. A water softener typically addresses hardness and scale. Filtration may target sediment, taste, odor, iron, or other substances. Reverse osmosis, or RO, uses a membrane to reduce many dissolved substances at a dedicated faucet or throughout the home, depending on the system.
The right choice depends on your water analysis, household demand, available space, and local requirements. Avoid choosing equipment based only on a neighbor's setup or a product's tank size.
Use a water test to guide the equipment
Begin with a recent laboratory water test, especially if the home uses a private well. Well water can vary between properties, and hardness may be only one part of the problem. Results may point toward pretreatment for sediment, iron, manganese, sulfur odor, acidity, or other concerns.
Municipal water users should review available utility information and discuss any remaining taste, odor, or scale concerns with a qualified installer. A test doesn't determine the entire installation by itself. The plumber or treatment professional must also review pressure, flow, drainage, and the home's layout.
Match treatment to where you use water
Whole-house treatment connects to the main supply, so treated water reaches multiple fixtures. Point-of-use equipment treats water at one location, such as an RO faucet beneath the kitchen sink. These choices create different plumbing plans.
For example, an under-sink RO unit needs a cold-water connection, a dedicated faucet opening, a storage tank, and a drain connection. A whole-house system needs space near the main line, a suitable drain route, bypass piping, and enough flow for the home.
If you're comparing options for a private well, review this guide to whole-house RO vs. water softener for well water before discussing equipment placement.
Map water treatment plumbing before demolition
The best water treatment plumbing plan starts with a simple site map. Mark the incoming water line, main shutoff, water heater, existing drains, electrical outlets, septic components if present, and the fixtures you want to serve.
Also note wall cavities, slab areas, cabinets, doors, and nearby equipment. A treatment tank that fits on paper may block a walkway or leave too little room to replace a filter.
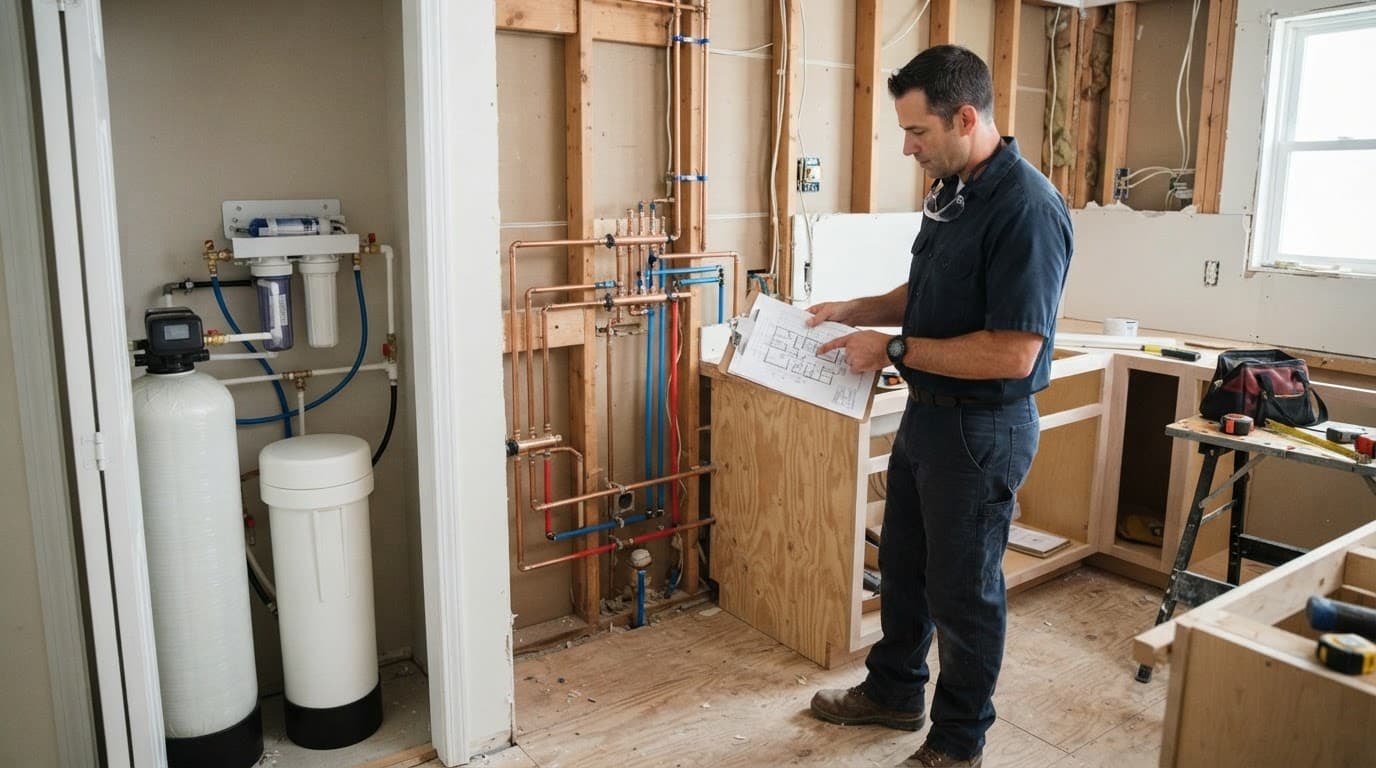
Choose a location that supports service
Garages, utility rooms, laundry areas, and mechanical closets often provide better access than finished cabinets. However, the best location depends on the equipment, water source, drain path, temperature, and available floor area.
Keep tanks away from locations where a leak could damage stored belongings or finished flooring. Protect equipment from freezing, excessive heat, direct sunlight, and impact. In Southwest Florida, garages can become hot, so ask the installer whether the proposed location suits the system's operating requirements.
Leave room to remove filter housings, add salt or media, inspect connections, and reach the bypass valve. Doors and panels should open fully without moving the entire system.
Plan each pipe route before walls close
A plumber should confirm where the untreated supply enters and where the treated line returns to the home's distribution system. The plan may include a bypass loop, isolation valves, pressure gauges, drain tubing, and connections for a future appliance or fixture.
Use approved materials and fittings for the application. Pipe supports should prevent strain on treatment equipment and wall connections. Where piping passes through framing, the remodel team may need protective plates or other safeguards against fasteners.
Take photographs after the rough-in but before insulation and drywall cover the work. Keep measurements tied to permanent landmarks. Those records can help locate concealed lines during a future repair.
Check pressure, flow, and equipment size
A water treatment system needs more than an open connection. Filters and softeners create resistance as water passes through them. RO systems may need storage, a booster pump, or a separate pressure arrangement, depending on the design.
Ask the installer to evaluate normal pressure, available flow, peak demand, and the condition of existing pipes. Equipment that works at one fixture may not support several showers, appliances, and faucets at the same time.
Account for peak household demand
List the fixtures that may run together. A morning schedule with showers, toilets refilling, a washing machine, and a kitchen faucet creates a different demand pattern than a one-person home.
The treatment professional can use this information with the water test and manufacturer requirements. Tank size, valve capacity, regeneration settings, membrane output, storage, and pipe diameter all affect performance. A larger unit isn't automatically a better choice if the home's flow or service space can't support it.
Review water softener sizing for private wells when a well system is part of the remodel. Sizing should consider water chemistry and usage, not household size alone.
Check the well pump before selecting treatment
Private-well homes need a pump and pressure-tank review. The pump's flow rate affects how much water treatment equipment can receive during use. Low recovery, pressure fluctuations, or several fixtures running at once may change the design.
A well pump can deliver water to the house while still falling short of a system's required service flow. This is why you should check your well pump before buying a softener or RO system. A qualified professional can compare pump performance with the proposed treatment sequence.
Design shutoffs, drains, and backflow protection
Every treatment layout needs controlled water flow and a safe way to discharge wastewater. Place shutoff valves where a homeowner or technician can reach them. A bypass valve can allow untreated water to reach the home during service, but the exact arrangement depends on the equipment.
Drain connections deserve the same attention as supply lines. A softener may discharge during regeneration, while an RO system sends reject water to a drain. Drain capacity, connection method, air gaps, and overflow protection must match the equipment and local plumbing requirements.
Use an approved drain connection
An air gap creates physical separation between a drain tube and the receiving drain. That separation helps prevent contaminated drain water from moving backward into the treatment system. Some installations use an air-gap faucet or another approved method, depending on the equipment and code.
Never push a drain tube loosely into a standpipe or floor drain without confirming that the connection is allowed. Secure the line so it can't whip, kink, or fall out during discharge. If the home uses a septic system, ask whether the proposed discharge volume and route are suitable.
Protect potable water from backflow
Backflow occurs when water moves in the wrong direction and enters the clean-water supply. Treatment equipment, hose connections, irrigation, pools, and outdoor water features can create different backflow concerns.
Your plumber should select required backflow protection based on the installation and local rules. If the property also has a lake fountain, keep its water and supply arrangements separate from drinking-water plumbing unless an approved design says otherwise. A fountain's circulation equipment and home treatment system have different purposes.
Contact the local building department or plumbing authority before work begins. Requirements can vary by jurisdiction, water source, fixture type, drain arrangement, and whether permits or inspections apply.
Coordinate the rough-in with every trade
Water treatment plumbing crosses several parts of a remodel. The plumber needs to coordinate with the treatment installer, electrician, cabinet installer, drywall contractor, and sometimes the well or septic contractor.
Discuss the complete layout during the design stage. A treatment unit may need a nearby outlet, a dedicated drain route, a sink cabinet opening, floor protection, or extra framing. Electrical requirements vary, especially when a booster pump, UV unit, lift pump, or monitoring equipment is part of the system.
Confirm the cabinet and utility details
Under-sink equipment needs more than empty cabinet space. The RO tank, filters, shutoff valve, drain connection, and faucet tubing must fit without crushing lines or blocking other fixtures. Cabinet drawers may need a revised layout.
Whole-house equipment needs a level surface and enough clearance for service. If the system will sit in a closet, verify that the door can open and that the unit can be removed later. The finished floor height can also affect drain routing and equipment connections.
Complete inspections before closing walls
Before insulation or drywall covers the work, inspect every visible connection. Confirm that the treatment installer and plumber agree on supply direction, bypass operation, drain placement, valve access, and equipment location.
Local code officials may require rough plumbing inspections before the walls close. Don't rely on a remodel schedule alone. Ask who will request inspections and what documentation the jurisdiction needs.
Keep the approved plans, water analysis, product manuals, warranty details, and installer contact information together. Those records make future service easier and help prevent accidental changes to the system.
Preserve service access and test before completion
Finished surfaces shouldn't force a technician to remove cabinets or cut drywall for routine maintenance. Keep filter housings, control valves, bypass handles, storage tanks, electrical connections, and drain points accessible.
A practical water treatment plumbing layout also includes leak protection. Use properly supported lines, accessible isolation valves, and connections that can be inspected. Where appropriate, a leak sensor or automatic shutoff may add protection, but the installer should match the device to the home's plumbing and equipment.
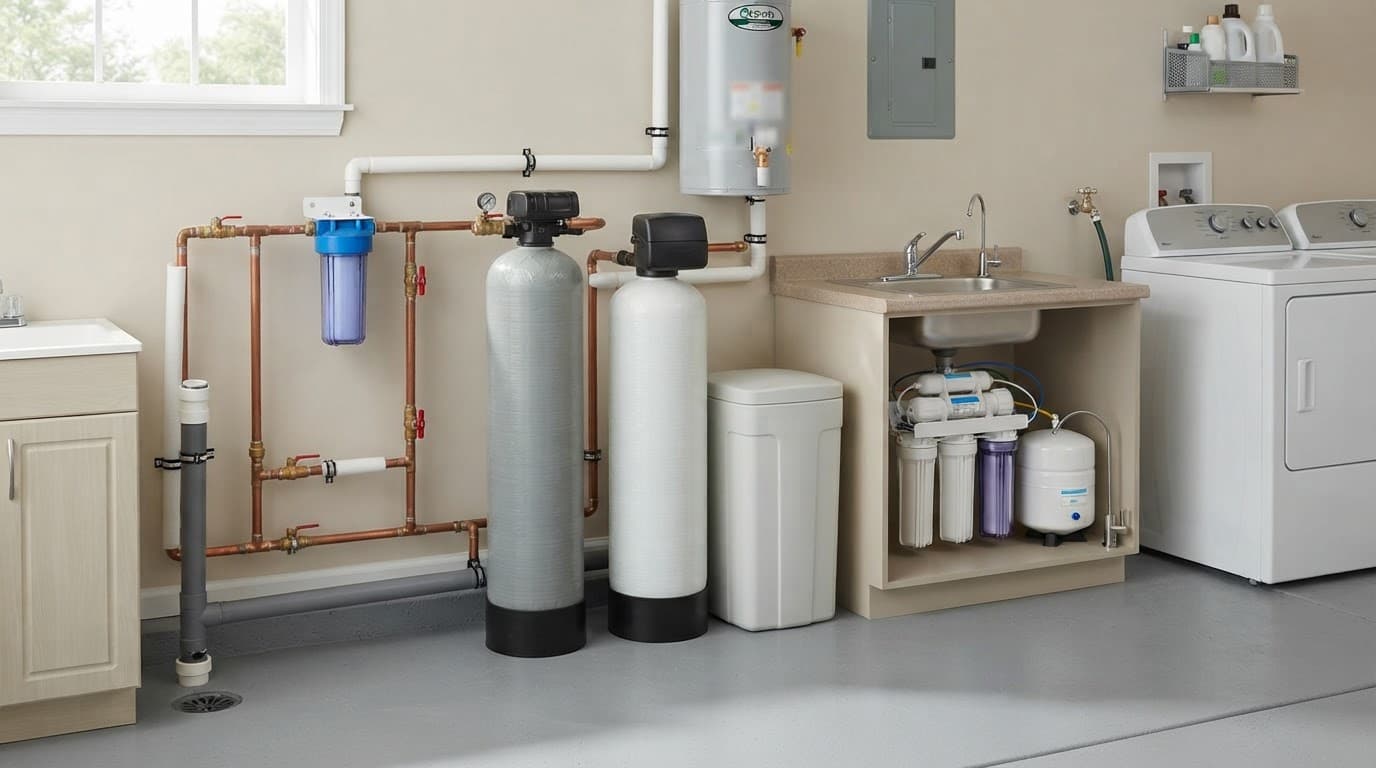
Leave working space around the equipment
Don't measure only the tank footprint. Account for the space needed to remove cartridges, add salt or media, replace tubing, clean components, and reach electrical or drain connections.
Avoid storing paint cans, boxes, or lawn equipment against treatment tanks. Keep the floor around the system dry and easy to inspect. If a cabinet hides the equipment, use removable panels rather than permanently sealed construction.
A professional water treatment installation can help match the equipment layout with the home's existing plumbing and future maintenance needs.
Commission the system before final finishes
Once the connections are complete, open water slowly and inspect every joint. Confirm that the system fills correctly, the bypass works, the drain discharges safely, and the equipment doesn't create an unexpected pressure drop.
Flush filters and membranes according to the manufacturer's instructions. Check the treated water after the required startup period, using the appropriate test for the treatment goal. For a well, additional testing may be appropriate after plumbing changes or equipment installation.
Before the remodel team closes the walls, complete these steps:
- Test supply and drain connections under operating conditions.
- Confirm that shutoffs and bypass valves are labeled or documented.
- Verify that electrical equipment has the required outlet and protection.
- Photograph the finished rough-in and record service clearances.
Conclusion
A successful remodel leaves water treatment equipment easy to use, inspect, and repair. Start with water quality and household demand, then plan the supply lines, drain, valves, power, and service space with the plumber and treatment installer.
Most problems become harder to fix after drywall and cabinets hide the work. When the rough-in is reviewed, local code requirements are confirmed, and the system is tested before final finishes, your water treatment plumbing has a better chance of supporting the home for years.
Latest posts
Read Our Blog
Tips, guides, industry best practices, and news.



Contact us
Get in touch
Our friendly team is ready to chat.